In the previous article named Best Video Formats for YouTube, we have introduced you how to convert any video to YouTube more compatible formats for upload. If you still can't upload video to YouTube after doing as the steps showed in the above article, the problem may be caused by your video size or length.
- 1. According to the rule on the video file size of YouTube: by default, the size of the video is less than 2GB. But 128GB is allowed with an up-to-date browser.
- 2. According to the rule on the video file length of YouTube: by default, the length of the video is up to 15 minutes. A longer video, maximum duration: 11 hours, is allowed only if you verify your account to increase limit.
Once the size or length of the video that you upload exceeds the maximum limit, YouTube refuses. To solve the problem like this, just get a useful video compressor and Faasoft YouTube Video Compressor (for Mac, for Windows) is the first choice.
Faasoft YouTube Video Compressor is such a program that allows you to compress video that you want to share on YouTube within a few clicks. Not only that, it can convert and edit any video and audio before processing compressing. Now, let's walk though the main features of this YouTube Video Compressor.

- Support compressing any kind of video formats like MP4, MOV, AVI, MKV, FLV, etc;
- Support compressing any kind of audio formats like MP3, WAV, FLAC, CAF, VOC, etc;
- Convert a widely range of video and audio to other more popular formats ;
- Convert any video and audio to optimized preset for most famous devices;
- Convert to commonly used picture formats like PNG, JPG, GIF, and etc;
- Edit video and audio with a powerful built-in editing tool;
- Preview the effects of the output video and audio;
- Play all kinds of video, audio and pictures.
Compress Video for YouTube
This easy-to-use Faasoft YouTube Video Compressor has an intuitive interface so that you don't need any technique training to handle it. Besides, it works on both Mac and Windows OS. This guide takes the Windows version as example.
Step 1 Add video file
To begin with, what you should do is to download and install the Windows version of Faasoft YouTube Video Compressor. After that, run the program and drag your video file that you want to compress to the main window.
Step 2 Choose output format (optional)
Click "Profile" drop-down button to choose YouTube output format from the corresponding category. If the format of current Profile is just what you want, skip this step.
Step 3 Compress video file
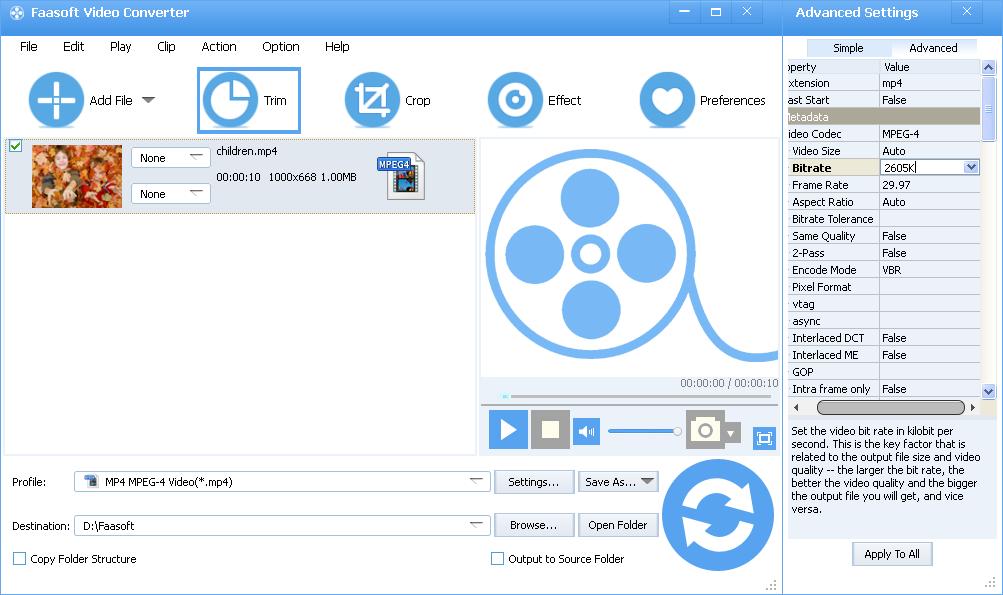
Click on "Settings..." button to turn to "Advanced Settings" pane and there click "Advanced" to go to "Advanced" tab. Here you can choose smaller Video Size(Resolution) or Bitrate to reduce video file size. To reduce video length, you should click Trim button on the tool bar of main window to cut out unwanted parts of your video.

Step 4 Start compressing
Click on the lower right "Convert" button to initiate compressing video for YouTube.

